Cold Chain Guides
Transport Refrigeration Controller Fault Codes: What Er1 to ErF4 Mean
A controller reports what its sensors and switches see, not what is broken. How to read Er1 to ErF4 on a direct-drive unit and what each group points to.
Transport Refrigeration Controller Fault Codes: What Er1 to ErF4 Mean
When a transport refrigeration unit stops holding temperature, the controller is usually the first thing that reports it. A code appears on the panel, the driver relays it by phone, and a decision gets made about whether to continue the route. That decision is only as good as the interpretation of the code.
A controller code is evidence, not a diagnosis. It reports what a sensor or a switch saw at a moment in time. Three very different faults can produce the same code, and one fault can produce several codes in sequence. Reading the groups correctly is what separates a five-minute fix from an unnecessary parts swap.
The codes below are those implemented on the AI-02 controller used with BlackShields direct-drive (non-independent) units. Other controllers use different numbering, so the grouping logic is the transferable part, not the numbers themselves.
How the Controller Sees the System
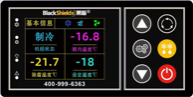
The driver panel carries an RS485 interface and controls, through its harness, the relays located in the condenser assembly. Those relays in turn switch the compressor, the fans and the valves. The panel's inputs are a small set of temperature sensors, two pressure switches, and the vehicle supply voltage.
That architecture explains the code structure. Nearly every code falls into one of four groups: a sensor circuit that has opened or shorted, a pressure switch that has opened, a supply voltage outside its window, or a fuse that has blown. The controller is not measuring refrigerant charge, compressor wear or coil fouling. It is measuring electrical continuity, switch state and voltage — and that is precisely why a code needs translating before it becomes a work order.
Group 1: Sensor Circuit Codes (Er1 to Er4)
The first four codes cover the two temperature sensors the controller depends on.
Code | Reported condition | What to check first |
|---|---|---|
Er1 | Return-air temperature sensor open circuit | Sensor connection and sensor condition |
Er2 | Return-air temperature sensor short circuit | Sensor connection and sensor condition |
Er3 | Evaporator coil temperature sensor open circuit | Sensor connection and sensor condition |
Er4 | Evaporator coil temperature sensor short circuit | Sensor connection and sensor condition |
The instruction attached to each of these is the same: check whether the connection is sound, or whether the sensor itself is damaged. An open circuit and a short circuit are opposite electrical failures, and both are reported as a sensor problem — which is useful, because it narrows the fault to the sensor or its wiring rather than to the refrigeration circuit.
The practical consequence is worth stating plainly. A failed return-air sensor does not stop the compressor; it removes the controller's ability to know what the box is doing. The unit may continue running, and the panel may show a plausible number, while the actual control loop is operating blind. That is why a sensor code should be treated as urgent even when the cargo appears fine.
Group 2: Pressure Switch Codes (Er90 and Er91)
Two codes cover the pressure switches.
Code | Reported condition | What to check first |
|---|---|---|
Er90 | High-pressure switch open | Confirm the high-pressure switch is operating normally |
Er91 | Low-pressure switch open | Confirm the low-pressure switch is operating normally |
These are the codes most often misread as a refrigerant charge problem or a compressor failure. A pressure switch opening is a protective action. It is telling you that a pressure limit was reached, and the switch did its job by interrupting the circuit. The fault may be the switch, the wiring to it, or the system condition that caused the pressure to move out of range.
That is why the correct first step is to confirm the switch itself is functioning normally before concluding anything about the refrigeration circuit. Replacing a compressor because Er90 appeared, without confirming the switch, is an expensive way to leave the real cause in place.
Group 3: Supply Voltage Codes (Er95 and Er96)
Direct-drive units draw their power from the vehicle. That makes the vehicle electrical system part of the refrigeration system, and the controller monitors it.
Code | Reported condition |
|---|---|
Er95 | Supply voltage too low |
Er96 | Supply voltage too high |
A voltage code shifts the investigation away from the refrigeration circuit entirely. The relevant questions become: what is the alternator doing, what is the battery condition, is there a poor connection adding resistance, and is another load on the vehicle competing for current at the same moment. A low-voltage code that appears only during certain driving conditions — at idle, or with lights and other equipment running — is a strong signal that the supply, not the refrigeration unit, is the problem.
This is one of the few code groups a driver can meaningfully help diagnose, simply by noting when the code appears. A code that appears at idle and clears at cruising speed describes a charging system at its limit, which is useful information before anyone opens the condenser cover.
Group 4: Fuse Codes (ErF1 to ErF4)
The fuse codes identify which circuit has lost power. The instruction for each is to open the relay box and inspect.
Code | Circuit |
|---|---|
ErF1 | Compressor fuse open |
ErF2 | Condenser fan fuse open |
ErF3 | Evaporator fan fuse open |
ErF4 | Defrost solenoid valve fuse open |
A fuse code is the most concrete of the four groups, because it names a circuit rather than a condition. It is also the group where replacement alone is most likely to be the wrong move. A fuse opens because current exceeded its rating, and that happens either because the circuit developed a fault or because a component is drawing more than it should.
The distinction between the fan codes is practically useful. An open condenser fan fuse and an open evaporator fan fuse both cause poor cooling, but they fail differently in the field: a stopped condenser fan drives pressures up and tends to bring on a high-pressure event, while a stopped evaporator fan leaves the box without air movement and shows up as a temperature that will not pull down even though the compressor is running. Neither is visible from the driver's seat, which is exactly why the code matters.
What a Code Does Not Tell You
Four things are outside what the controller can report, and each of them is a common cause of repeat callouts.
First, the controller does not know how much refrigerant is in the system. Charge is confirmed by looking at the receiver sight glass, and if no liquid is visible there, the charge may be insufficient and a qualified technician should attend.
Second, the controller does not know whether the evaporator coil is blocked with ice. That condition is identified by starting a manual defrost and watching whether the return-air temperature recovers once the cycle completes.
Third, the controller does not know whether the cargo was loaded at the correct temperature, whether the body was pre-cooled, or how long the vehicle sat on a dock with the doors open. All of that lives in the loading record, not in the panel.
Fourth, the controller does not know whether air can actually reach the cargo. Poor circulation — from mis-stacked freight, a shifted load, or a blocked return-air path — produces the same symptom as a refrigeration fault and will not clear with any amount of servicing.
A code tells you which circuit reported a problem. It does not tell you which component caused it, and it never tells you what happened before the vehicle was loaded.
A Practical Triage Order
When a code appears mid-route, the useful sequence is short.
Read the code and assign it to one of the four groups. Note when it appeared and what else the vehicle was doing at the time — that single observation often separates a voltage fault from a refrigeration fault. Check the return-air reading against the required band rather than trusting the presence or absence of a code. Then apply the in-transit rule: if the reading is outside the band, recheck every 30 minutes, and if two consecutive checks are still out of range, stop the unit and call for service rather than continue.
A code that keeps reappearing after a component swap usually means the cause is upstream of the component. Why is your TRU losing cooling capacity sets out a four-area diagnostic sequence that pairs with code-level triage.
For the unit this controller is fitted to, including its rated capacities and mounting configurations, see the HD-380 product page.
That last step is the one most often skipped. Continuing a route on a unit that has drifted out of range does not preserve the cargo; it moves the loss further down the chain, where it is harder to attribute and more expensive to absorb.